Installing switches and power outlets is one of the most important phases in electrical wiring and home renovation. Following proper standards and performing the installation correctly ensures both safety and a professional final appearance on the walls. Below is a comprehensive, step-by-step guide based on standard electrical principles and the practices used by professional electricians in real projects.
1. Determining the Required Number of Switches and Outlets
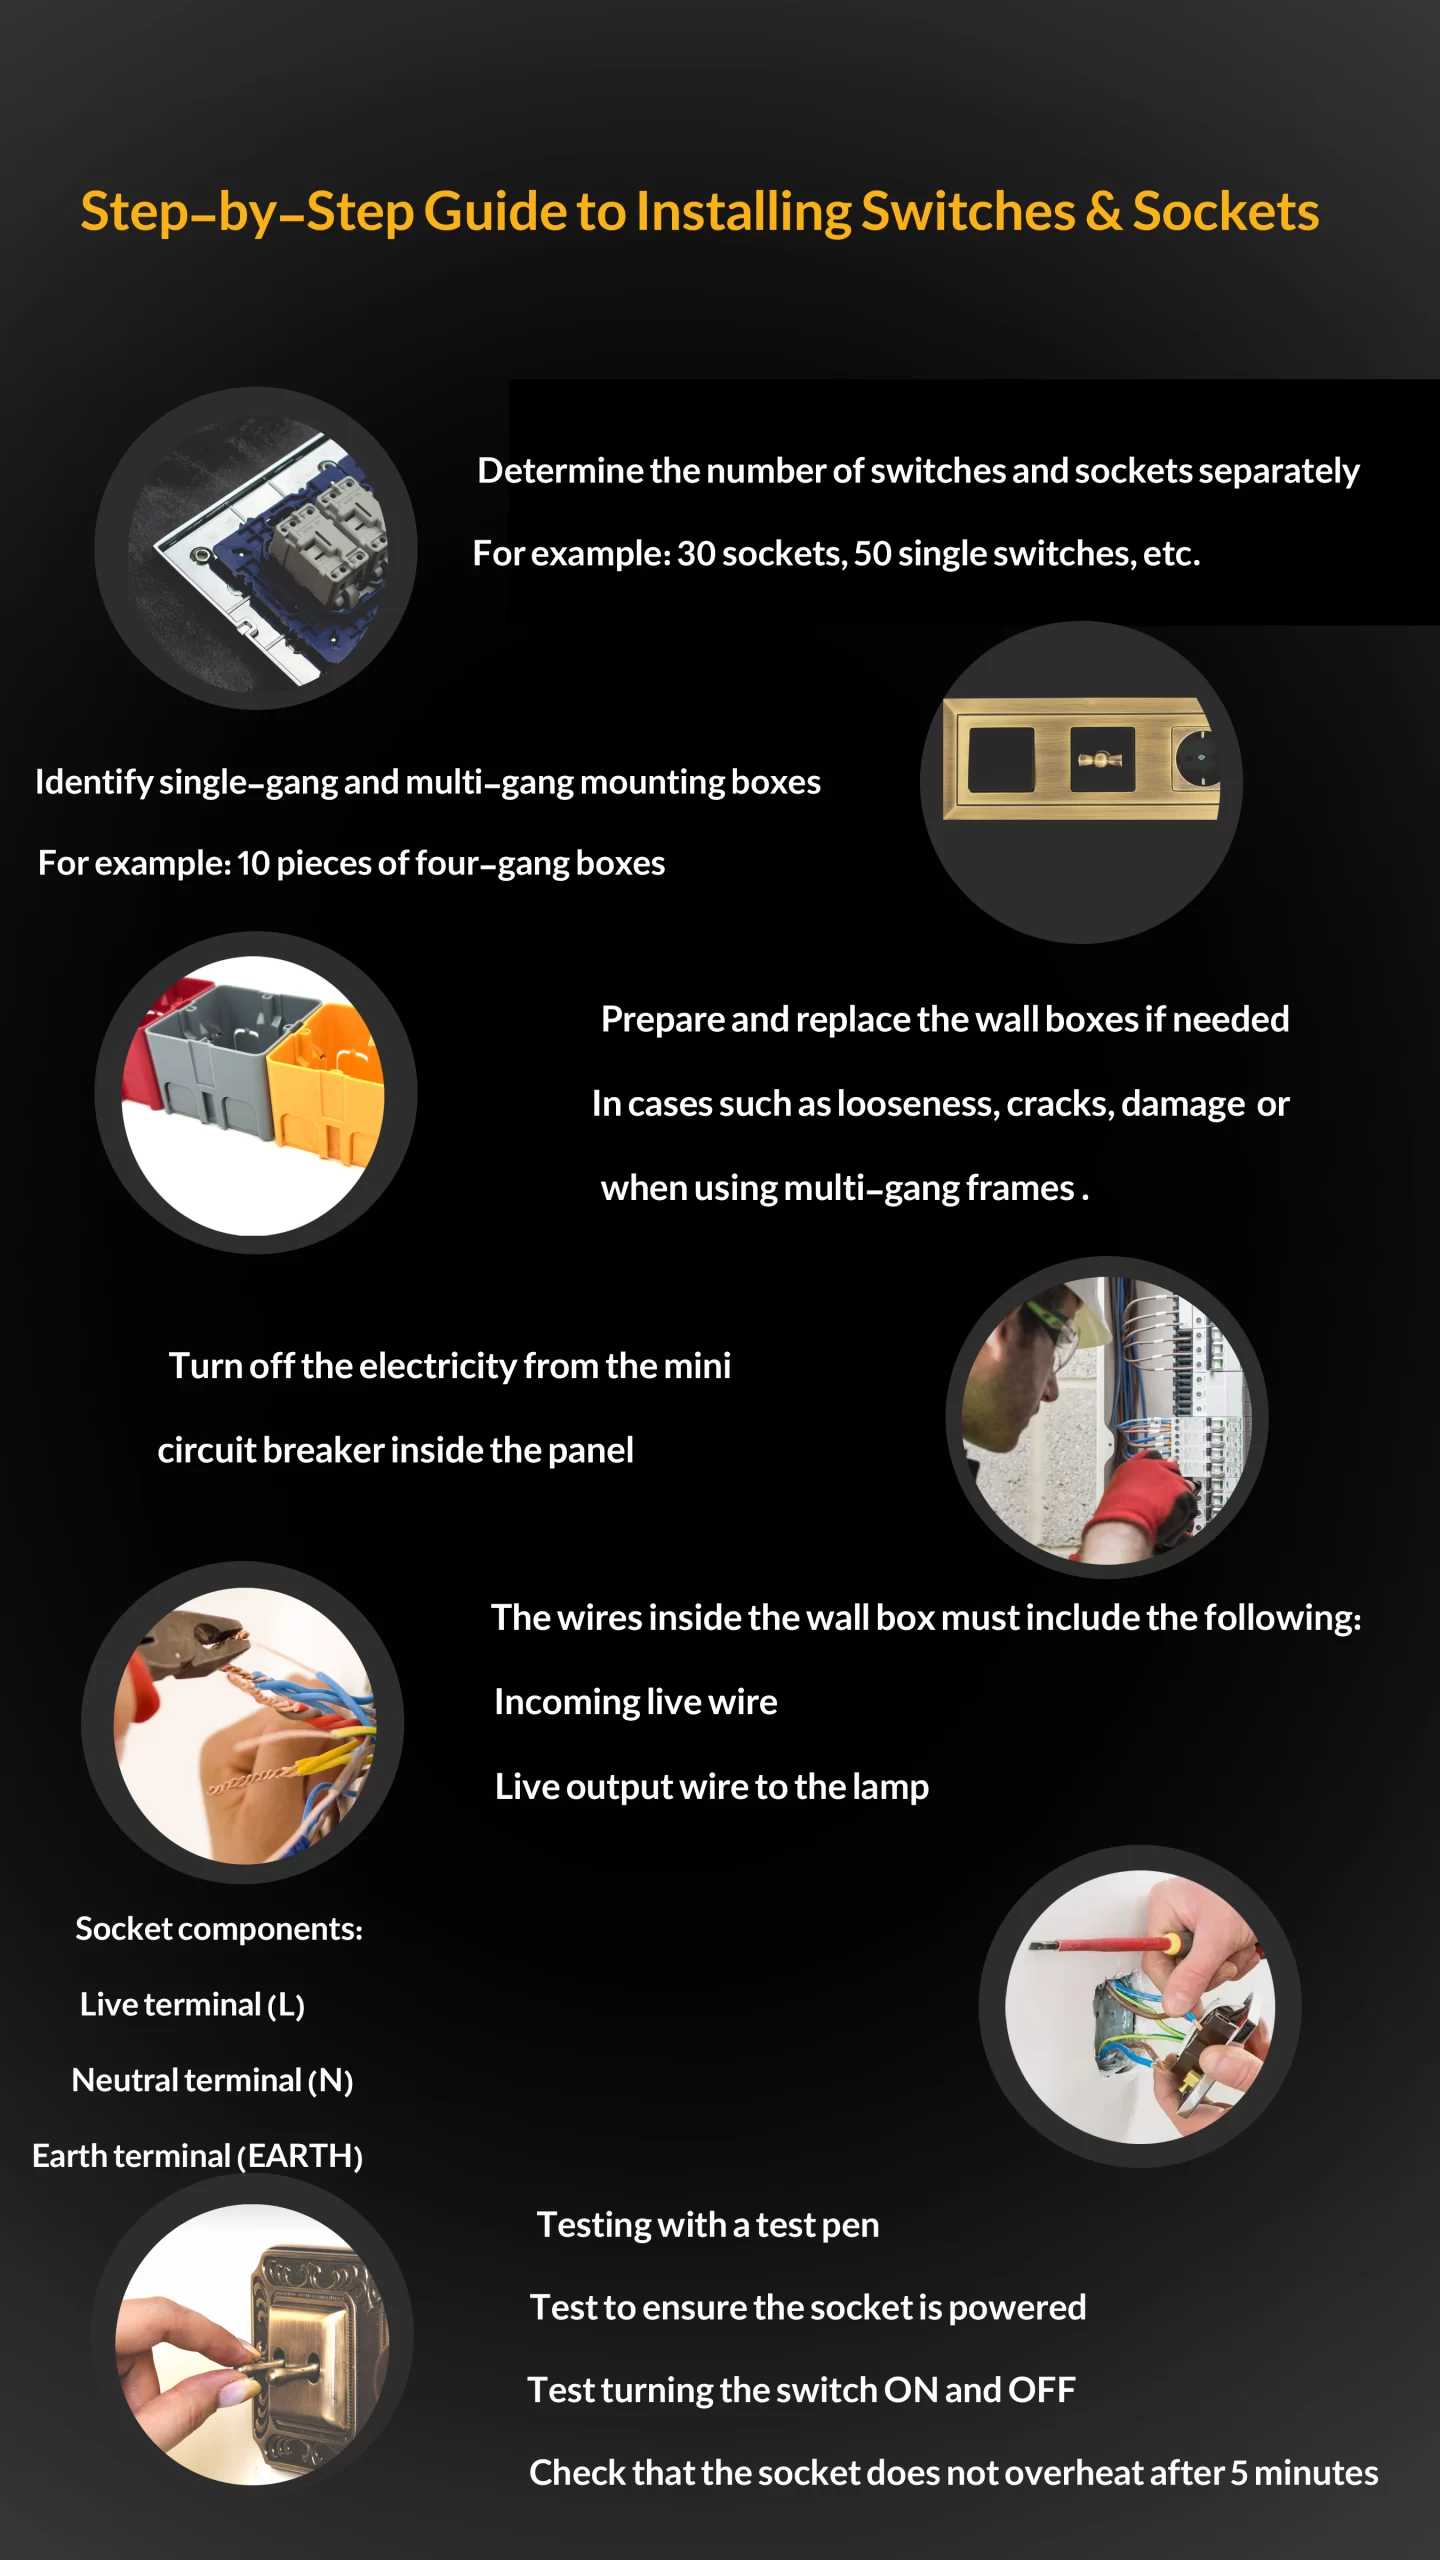
The first step is to identify the exact number of switches and outlets needed. This depends entirely on the electrical plan and the layout of each space.
For example:
-
30 power outlets
-
50 single or double light switches
-
Two-way or cross switches for staircases or bedrooms
Proper categorization ensures accurate purchasing, installation, and measurement without shortages or mistakes.
2. Choosing the Type of Frames: Single-Gang to Multi-Gang
In this step, you must determine whether the switches and outlets will be installed as:
-
Single-gang
-
Double-gang
-
Triple-gang
-
Four-gang or more
For example, if 10 four-gang frames are required, the mechanisms and wall boxes must be compatible in size and alignment. This step is especially important in modern projects or when installing luxury switch and outlet systems.
3. Preparing and Replacing Wall Boxes
During renovation, old wall boxes often have issues such as:
-
Looseness
-
Cracks
-
Insufficient depth
-
Old design incompatible with modern switches
In such cases:
-
Boxes must be replaced
-
New boxes with standard depth should be installed
-
Perfect leveling is required for multi-gang frames
This step greatly affects the final quality of the installation.
4. Turning Off Power From the Mini Circuit Breaker
Before doing any work, the electricity must be completely disconnected from the electrical panel. This is crucial because:
-
Turning off only the lighting switch is not enough
-
Some wires may still carry current
After disconnecting the breaker, test the wires with a voltage tester to ensure full power shutdown.
5. Checking the Wires Inside the Wall Box
Inside each switch or outlet box, specific wires must be present:
For switches:
-
Incoming live wire
-
Outgoing live wire to the lamp
For power outlets:
-
Live (L)
-
Neutral (N)
-
Earth (Ground)
If the renovation area lacks an earth wire, it is recommended to install a new grounding line. Having an earth connection is essential for safety, especially in kitchens, bathrooms, and humid areas.
6. Components of a Power Outlet and How to Connect Them
Standard outlets include three terminals:
-
Live terminal (L)
-
Neutral terminal (N)
-
Earth terminal (Earth)
Correct installation:
-
Connect live to L
-
Neutral to N
-
Earth to the grounding screw
Loose screws or incorrect wiring can lead to overheating or even fire hazards.
7. Leveling the Mechanisms and Installing the Final Frame
After connecting the wires:
-
Mount the mechanism onto the wall box
-
Use a small leveling tool to ensure perfect alignment
-
Install the final frame
In renovation projects, walls are often newly plastered and may not be completely flat, so leveling is especially important.
8. Final Testing and Inspection
After installation, perform the following tests:
-
Test with a voltage tester
-
Check if the outlet is powered
-
Turn the switch on and off
-
Ensure the outlet does not overheat after 5 minutes
If overheating occurs, possible causes include:
-
Loose wire connections
-
Incorrect wiring
-
Excessive load on the outlet
In such cases, the issue must be fixed immediately.
Installing switches and outlets may seem simple, but even a small mistake can cause severe hazards such as electric shock, fire, or device failure. In renovation projects, proper installation becomes even more critical because:
-
Old wall boxes may be worn out
-
Previous wiring is often non-standard
-
Modern or luxury switches require precise alignment and proper spacing
By following the steps above, the installation will be safe, correct, and professional.
Frequently Asked Questions About Installing Switches and Outlets
1. Is installation different in old houses compared to new buildings?
Yes. In renovations, boxes often lack sufficient depth, the wiring is outdated, and grounding may be missing. In new buildings, everything is usually standard and easier to work with.
2. What is the standard installation height for switches and outlets?
-
Light switch: 110–120 cm from the floor
-
Power outlet: 30–40 cm from the floor
-
Kitchen countertop outlets: around 110 cm
Following these standards ensures both safety and aesthetics.
3. Can I install an outlet if there is no earth wire?
It is possible, but it greatly reduces safety. Outlets in kitchens, bathrooms, and humid areas must have an earth connection.
4. Why does a switch or outlet get warm after installation?
Possible reasons:
-
Loose screws
-
High device load
-
Old or thin wiring
-
Incorrect live wire connection
The issue must be resolved immediately.
5. What should I consider when installing multi-gang frames?
Perfect alignment of the boxes is essential. Even slight height differences will make the frame look crooked.
6. Can modern or glass switches be installed on old wall boxes?
Usually no. These models require deeper, standardized boxes. It is recommended to replace the old boxes.
7. How can I identify the live wire when installing a switch?
Using a voltage tester (test pen). When the tip touches a live wire and your hand touches the end of the tester, a small light illuminates.
8. Does a two-way switch require special wiring?
Yes. It needs two traveler wires between the switches. Most old buildings lack this wiring, so it must be added.
9. When should a wall box be replaced?
In the following cases:
-
Looseness
-
Cracks or deformation
-
Insufficient depth
-
Poor leveling
-
Multi-gang installations
-
Installing modern or smart switches
10. What tools are needed for installation?
-
Voltage tester
-
Wire stripper and cutter
-
Flat and Phillips screwdrivers
-
Small level
-
Hammer or chisel if box adjustment is required
The right tools prevent damage to the wiring and frames.
11. Can non-professionals install switches and outlets themselves?
If power is fully disconnected and instructions are followed, yes.
However, in old houses or where wiring is non-standard, hiring a professional is strongly advised.
12. When should switches and outlets be tested after installation?
Immediately after powering on.
Then the outlet should be tested under load for 5 minutes to ensure it does not heat up.

